Flutter web app for newsletter sign up using Firebase functions

The title is a mouthful but unfortunately this is what the tutorial is about. Creating a web app using Flutter which demonstrates signing up for a newsletter and uses Firebase functions in the backend.
Coming from a Java background I wanted to give Dart (the language that Flutter is based on) and Flutter a go since they claim that Dart is very similar to Java. That is mostly true along with some additional JS like syntax. Unfortunately, there aren’t that many tutorials on Flutter and even making something as basic as a newsletter sign up took an age to figure out (or maybe I’m just too slow).
I have no affiliation with Flutter or Google and no one has paid me to make this tutorial… sadly.
What is this tutorial about?
I will show you how to create a Flutter project and add the UI elements to create a sign up page for a newsletter with a loading animation once the user clicks sign up and outputting a success/failure message for the sign up.
The logic of the sign up will take place through a Firebase function because you don’t want your mailing list’s API key to come up on the client side code. Functions is very similar to AWS lambda — backend code.
You will use FireFlutter to connect your web app to Firebase.
This is not a tutorial to learn Dart nor will I focus on designing/themeing the UI.
What will you need?
- I’m using Visual Studio Code but you can use whatever IDE you want. VSCode has support for Flutter so it makes it a little easier to use.
- Good understanding of a programming language.
- A Firebase account. Be prepared to upgrade your Firebase project to a paid account because functions is part of their paid service butttt you get 2 million function calls a month free so it’s just a matter of adding your credit card details. Like AWS.
Steps
- Create sign up form — front-end
- Create Firebase project
- Initialise and deploy front-end
- Create sign up function — back-end
- Initialise FireFlutter
- Run final product
Create the Sign Up Form — Front-end
In your terminal or on VSCode or your own IDE, let’s start by creating a Flutter project.
Create a flutter project
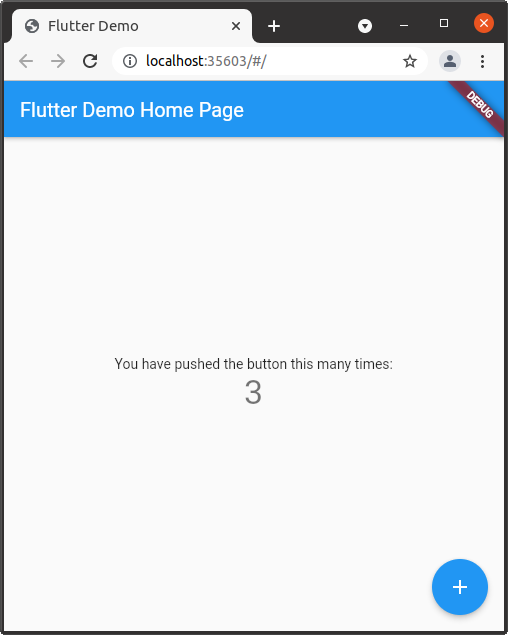
flutter create newsletter_signupflutter pub getto download all the dependencies- This will create a demo app in the folder
newsletter_signupwith all the required files to run it. You can run it either withflutter runorflutter run -d chrometo force it to launch as web app and not a device app. - This is what it looks like:
If you have reached so far that means your project was created successfully. Now let’s add some code to create a sign up form.
Create sign up form
I’m going to put all the code here first and then explain the various parts of it below. Replace your code in main.dart in the lib directory with the code below.
//main.dart
import 'package:flutter/material.dart';
import 'package:newsletter_signup/signup_form.dart';
void main() async {
  WidgetsFlutterBinding.ensureInitialized();
  await Firebase.initializeApp();
  runApp(MyApp());
}
class MyApp extends StatefulWidget {
  const MyApp({Key? key}) : super(key: key);
@override
  _MyAppState createState() => _MyAppState();
}
class _MyAppState extends State {
  // This widget is the root of your application.
  @override
  Widget build(BuildContext context) {
    return MaterialApp(
      title: 'Sign up for My Newsletter',
      theme: ThemeData(
        // This is the theme of your application.
        //
        // Try running your application with "flutter run". You'll see the
        // application has a blue toolbar. Then, without quitting the app, try
        // changing the primarySwatch below to Colors.green and then invoke
        // "hot reload" (press "r" in the console where you ran "flutter run",
        // or simply save your changes to "hot reload" in a Flutter IDE).
        // Notice that the counter didn't reset back to zero; the application
        // is not restarted.
        primarySwatch: Colors.blueGrey,
      ),
      home: MyHomePage(title: 'My Newsletter'),
    );
  }
}
class MyHomePage extends StatelessWidget {
  MyHomePage({Key? key, required this.title}) : super(key: key);
// This widget is the home page of your application. It is stateful, meaning
  // that it has a State object (defined below) that contains fields that affect
  // how it looks.
// This class is the configuration for the state. It holds the values (in this
  // case the title) provided by the parent (in this case the App widget) and
  // used by the build method of the State. Fields in a Widget subclass are
  // always marked "final".
final String title;
@override
  Widget build(BuildContext context) {
    // This method is rerun every time setState is called, for instance as done
    // by the _incrementCounter method above.
    //
    // The Flutter framework has been optimized to make rerunning build methods
    // fast, so that you can just rebuild anything that needs updating rather
    // than having to individually change instances of widgets.
    return Scaffold(
      appBar: AppBar(
        // Here we take the value from the MyHomePage object that was created by
        // the App.build method, and use it to set our appbar title.
        title: Text(
          title,
        ),
      ),
      body: Center(
        // Center is a layout widget. It takes a single child and positions it
        // in the middle of the parent.
        child: Padding(
          padding: EdgeInsets.symmetric(horizontal: 30, vertical: 16),
          child: Column(
            children: <Widget>[
              const SizedBox(
                height: 32.0,
              ),
              Text(
                'Sign up here for my newsletter',
                textAlign: TextAlign.center,
                style:
                    const TextStyle(fontWeight: FontWeight.bold, fontSize: 16),
              ),
              SignUpForm(),
              const SizedBox(
                height: 32.0,
              ),
            ],
          ),
        ),
      ),
    );
  }
}
The code won’t run yet as we still have to create the sign up form. So don’t panic. I will point out a few things to note here but the more interesting stuff will come in the sign up form code.
- You can use the
ThemeDatato customise a bit. I have changed the theme colour to blue gray instead of the original blue. More about themes here — https://flutter.dev/docs/cookbook/design/themes - Update the
titleto what you want. - I’ve wrapped the widgets in a padding widget so that they don’t touch the edges of the screen.
- You can use SizedBox to add vertical space.
- I’ve created a custom widget called
SignUpFormwhich we will look at now!
Now to create the sign up form, we will need to add a dependency to validate the form fields (making sure it is an email etc.). Open pubspec.yaml and add the following:
dependencies:
  flutter:
    sdk: flutter
  email_validator: "^2.0.1" #Line to add
In the terminal, run flutter pub get to download and install the dependency.
Create a new file in the lib directory called signup_form.dart and enter the code below:
//signup_form.dart
import 'dart:async';
import 'package:email_validator/email_validator.dart';
import 'package:flutter/material.dart';
import 'package:flutter/widgets.dart';
class SignUpForm extends StatefulWidget {
  @override
  State<StatefulWidget> createState() {
    return _SignUpFormState();
  }
}
class _SignUpFormState extends State<SignUpForm> {
  final _formKey = GlobalKey<FormState>();
  String? email;
  String? name;
  String sentResponse = "Sign up failed. Please try again.";
  bool showResponse = false;
  bool showLoading = false;
@override
  Widget build(BuildContext context) {
    return Form(
      key: _formKey,
      child: Padding(
        padding: EdgeInsets.all(16),
        child: Column(
          children: <Widget>[
            TextFormField(
              // The validator receives the text that the user has entered.
              validator: (value) {
                if (value == null || value.isEmpty) {
                  return 'Please enter some text.';
                }
                return null;
              },
              onSaved: (name) => this.name = name,
              decoration: InputDecoration(
                  border: UnderlineInputBorder(), labelText: 'Name'),
            ),
            SizedBox(height: 12),
            TextFormField(
              // The validator receives the text that the user has entered.
              validator: (val) => !EmailValidator.validate(val!, true)
                  ? 'Please enter a valid email.'
                  : null,
              onSaved: (email) => this.email = email,
              decoration: InputDecoration(
                  border: UnderlineInputBorder(), labelText: 'Email'),
            ),
            SizedBox(height: 12),
            Visibility(visible: showResponse, child: Text(sentResponse)),
            Visibility(
                visible: showLoading,
                child: CircularProgressIndicator(
                  valueColor:
                      AlwaysStoppedAnimation(Theme.of(context).primaryColor),
                )),
            SizedBox(height: 18),
            ElevatedButton(
              onPressed: submit,
              child: Text('Sign Up'),
            )
          ],
        ),
      ),
    );
  }
Future submit() async {
    // Validate returns true if the form is valid, or false otherwise.
    if (_formKey.currentState!.validate()) {
      _formKey.currentState!.save();
setState(() {
        showLoading = true;
        showResponse = false;
      });
//Simulate time for response
      Timer(Duration(milliseconds: 1500), () {
        try {
          //Send request
          sentResponse = "Success!";
          _formKey.currentState!.reset();
        } catch (err) {
          print(err.toString());
        }
        setState(() {
          showLoading = false;
          showResponse = true;
        });
      });
    }
  }
}
Here is the main reason why I created this tutorial. For the life of me I could find nothing online that assisted me in how I could show a loading indicator once the user hits Sign Up and then followed by a success/failure message. So here it is!
- The
buildmethod is the interesting part for the loading indicator. I use the Visibility widget which takes a boolean value under the propertyvisibileand under the propertychildyou add the widgets that you want to show and hide. Yes, like the loading indicator and the success/failure messages. - I’ve created two visibility widgets. 1. Loading indicator 2. Success/Failure message. Each of them are controlled by the variables
showLoadingandshowResponse. These values get updated in thesetState()methods of the sign up form. You can see that in thesubmit()function. - To use the email validator that we installed, check out the
TextFormFieldwidget. It has a property calledvalidatorwhich uses theEmailValidatorclass to make sure the user is entering an email address or show an error message. - In the
submitfunction, I am only simulating the amount of time it would take for the user to click Sign Up, send the request to your mailing list software and then return a response. So ignore theTimerobject for now. In the next section, we will be creating the function that will handle the actual sign up.
Ok we are ready to run! Exciting! In your terminal,
flutter run -d chrome
I really hope all goes well and you are able to see this:
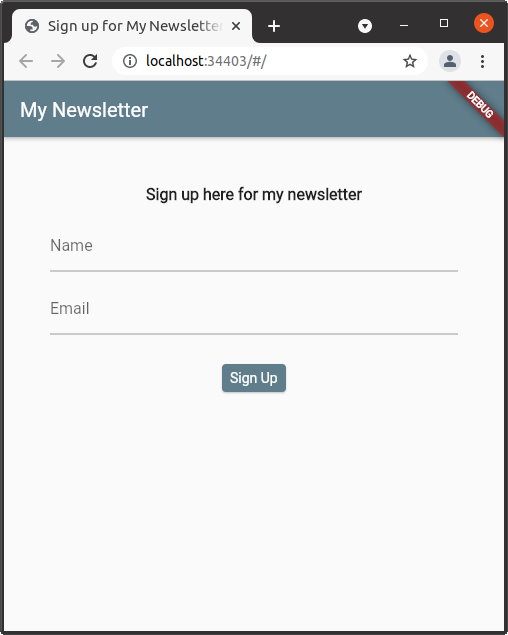
Play around with it. Click the sign up button with empty fields or incorrect email type etc. and get a feel for how much UI is taken care of with so little code :)
Note: If you are having problems, you can try DevTools for trouble shooting or even to familiarise yourself with it so you can debug easily.
Note: Flutter supports hot reloading while you are coding because launching these apps can take longer and longer as you add more code so you don’t want to relaunch every time you make a small change in the code. Generally, on VS Code, once I launch the app, I just press ‘r’ on my keyboard from the VS terminal.
Create a Firebase Project
Firebase is kind of like AWS. You can host your app on there, run its back-end, if you are doing phone apps, then it manages that for you as well. Since Flutter is a Google product, I thought it best to run the web app on Firebase as there is better Flutter support for it.
- Open your Firebase console .
- You can login using your standard Gmail email ID or create a new one for this.
- Click Add Project
- Give it a name. It will also create a unique project ID while you are entering the name. Remember that.
- Disable Google Analytics for now
- And click Create Project
Initialise and Deploy Front-end
Before we add in the sign up logic, let’s send off the sign up form to Firebase and see what it looks like online.
- Let’s head back to the codebase now for the front-end and in your terminal, first download the firebase CLI tools.
Enter
npm -g install firebase-tools - Once installed,
firebase loginHere you login using your GMail ID used to create the Firebase project in the previous section. - Once logged in,
firebase init - This will ask you a series of questions. First select Hosting: Configure files for Firebase…
- Then Use an existing project
- And select the project you had just created on Firebase in the previous step.
- For the public directory for web apps, enter
build/webThis the directory that will be deployed to Firebase. - For the rest you can select defaults.
- Now, we build the web app,
flutter build web - Once that is completed, we deploy it to Firebase,
firebase deploy - After the files are deployed, the terminal will show the hosting URL or alternatively you can go to Hosting in your Firebase console and get the link from there.
- Go to the deployed web app and check out your newly deployed web app live on the web!
Create Sign Up Function — Back-end
The web app still doesn’t actually sign any users up to your mailing list. The logic for this will take place in a Firebase Function . This is a great way to create some serverless code that will handle some of the work for the client side app. You can call these functions directly from your Flutter app and the Firebase console gives some nifty analytics on the usage too.
A reminder again that you must upgrade your Firebase project to Blaze as functions can only be used once you share your credit card details with them.
Initialise project
- Head back to your Flutter app’s project on VS Code. In the terminal,
firebase init functions - Select javascript
- Select defaults for the rest of the questions
- This will initialise your project to create functions. A folder called functions will be created with a demo
index.jsfile in which you will write the function.
Create function
Remove the commented code from index.js and enter the following code:
const functions = require("firebase-functions");
exports.signUp = functions.https.onCall((data, context) => {
   return "Success from my function!";
})
For simplicity sake, I am just returning a success message if the function is successfully called. The request to your mailing list server will be standard Node.js code so there are many examples on how to add subscribers to the mailing list. For API key handling, Firebase provides environment config handling or you can use old school dotenv.
The interesting part is functions.https.onCall This method is used to call functions from the app directly and is not a standard HTTP request. It’s an interesting difference to note.
Note: Call functions from your app directly Vs Call functions via HTTP requests
Deploy function
Lastly, you need to deploy this function to Firebase. In order to do that, enter the following in the terminal,
firebase deploy --only functions
Check that the function is deployed on your project’s Firebase console.
Note: If you rather run the functions locally, try the emulator suite. For this tutorial, look here .
Initialise FireFlutter
The function is ready but we need to call it from the front-end. In order to do this we have to use FireFlutter — the official plugins for Firebase on Flutter (I guess the name kind of says it all).
I found this process a bit cumbersome and I really hope they simplify it in the future.
Open pubspec.yaml and enter the following dependencies:
dependencies:
  flutter:
    sdk: flutter
  email_validator: "^2.0.1"
  firebase_core: "1.6.0" #Line to add
  cloud_functions: "^3.0.1" #Line to add
Run flutter pub get
Open main.dart and enter the following import statement:
import 'package:firebase_core/firebase_core.dart';
Now update the main() function like so:
void main() async {
  WidgetsFlutterBinding.ensureInitialized();
  await Firebase.initializeApp();
  runApp(MyApp());
}
These steps have installed and initialised FireFlutter. More info here — https://firebase.flutter.dev/docs/overview/
Web Installation
The web app needs to be configured to use FireFlutter. To do this, we must make a few more edits. This is why it is a bit cumbersome. And this is why a tutorial is needed!
Open /web/index.html and add the following in the <body> tags but above the service worker script.
<script src="https://www.gstatic.com/firebasejs/8.6.1/firebase-app.js"></script>
<script src="https://www.gstatic.com/firebasejs/8.6.1/firebase-functions.js"></script>
Now, we need to put in the Firebase configuration.
- Head on to the project’s Firebase console. Under Project Overview, add an app. Select Web app.
- Provide a name for your the app.
- No need to set up Firebase Hosting as we have already done that.
- Click Register app
- In step 2, you will be asked to add the Firebase SDK and the config info to
/web/index.html. It should look something like this:
// Your web app's Firebase configuration
<script>
const firebaseConfig = {
  apiKey: "KEY",
  authDomain: "PROJECT.firebaseapp.com",
  projectId: "PROJECT",
  storageBucket: "PROJECT.appspot.com",
  messagingSenderId: "1234567",
  appId: "123jhsdf8"
};

// Initialize Firebase
firebase.initializeApp(firebaseConfig);
</script>
Technically, this should be everything you need to set up and initialise FireFlutter but this is all a bit finicky so if you have any problems, do check out Flutter’s Discord channel . Everyone is really helpful there.
Note: more info on FireFlutter web installation here — https://firebase.flutter.dev/docs/installation/web
Run Final Product
The last thing to do is to add the function call in the front-end. Edit the signup_form.dart file like so,
import 'package:cloud_functions/cloud_functions.dart';
Future submit() async {
    // Validate returns true if the form is valid, or false otherwise.
    if (_formKey.currentState!.validate()) {
      _formKey.currentState!.save();
      setState(() {
        showLoading = true;
        showResponse = false;
      });
      try {
        //Send request
        //Call firebase function
        FirebaseFunctions functions = FirebaseFunctions.instance;
        HttpsCallable callable =
            FirebaseFunctions.instance.httpsCallable('signUp');
        final results = await callable();
        sentResponse = results.data;
        // sentResponse = "Success!";
        _formKey.currentState!.reset();
      } catch (err) {
        print(err.toString());
      }
      setState(() {
        showLoading = false;
        showResponse = true;
      });
    }
  }
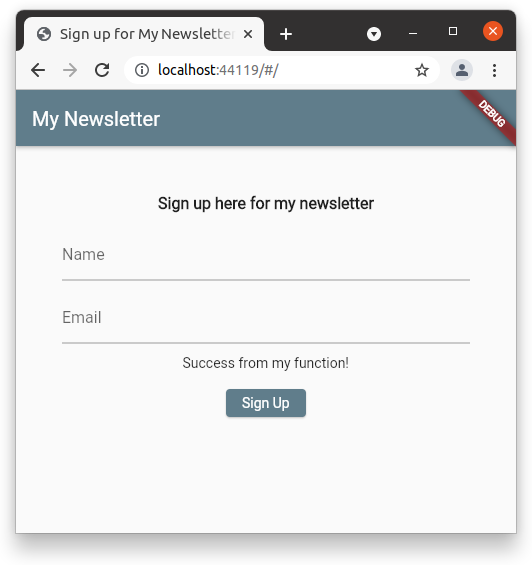
In your terminal, flutter run and check that your function is working. Once ready, you can deploy it to Firebase and check it out.
Source Code for this tutorial
Run an emulator for the function
Hope this guide was useful and if there are any comments/edits/problems/questions, please do ask away :) All feedback is welcome. Feel free to ask any questions via Twitter as well — https://twitter.com/neha_m25


